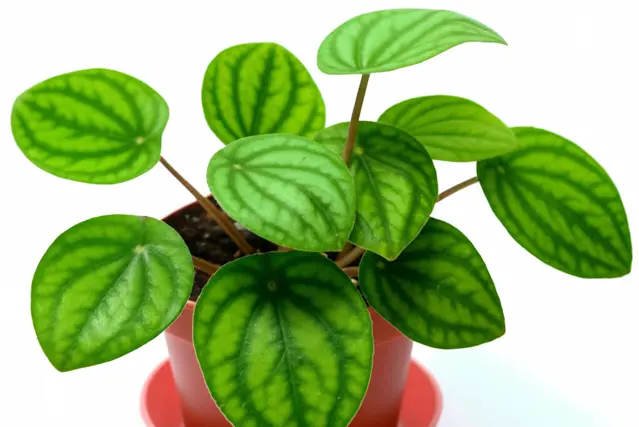
The Pilea peperomioides, affectionately known as the Chinese Money Plant, Pancake Plant, or UFO Plant, is a beloved houseplant cherished for its unique, coin-shaped leaves and ease of care. In 2025, its popularity continues to soar, fueled by trends in indoor gardening and the desire for sustainable living.
One of the most rewarding aspects of owning a Pilea is the ability to propagate new plants from the parent, expanding your collection and sharing the joy with friends and family. While traditionally propagated from pups (offsets growing from the base of the plant), propagating Pilea from leaves is a fascinating, albeit sometimes more challenging, alternative. This comprehensive guide will walk you through the step-by-step process of propagating Pilea from leaves in 2024, providing you with the knowledge and techniques needed for success.
Why Propagate Pilea Plants? Plant propagation offers numerous benefits. It’s an economical way to expand your plant collection without spending money on new plants. It’s also a rewarding experience to nurture a new plant from a small cutting.
Furthermore, propagating helps to share the joy of plant parenthood with friends, family, and your community. Propagation contributes to plant biodiversity and conservation efforts, especially when dealing with rare or endangered species (although, Pilea peperomioides is not currently endangered). In 2025, with rising awareness about sustainability and reducing consumption, propagation aligns perfectly with the growing trend of self-sufficiency and mindful living.
Understanding Pilea Propagation
Before diving into the specifics of leaf propagation, let’s understand the basics of how Pileas reproduce and why leaf propagation can be a bit trickier than other methods.
The Standard Method: Pup Propagation
The easiest and most common method of Pilea propagation is through “pups.” These are baby plants that grow directly from the base of the mother plant. They readily develop their own root systems and can be easily separated and repotted. This method has a high success rate because the pups already possess the necessary infrastructure for growth.
The Leaf Propagation Challenge
Propagating from leaves is a slightly more advanced technique. Unlike pups, leaves don’t inherently possess a root system. They need to develop both roots and a new growth point (the node where a new plant will emerge). This is a crucial distinction. Pilea leaves, unlike some plants, don’t always readily produce a new growth point when rooted. This is why success rates for leaf propagation are often lower than pup propagation. However, with the right approach, patience, and attention to detail, you can successfully propagate Pileas from leaves.
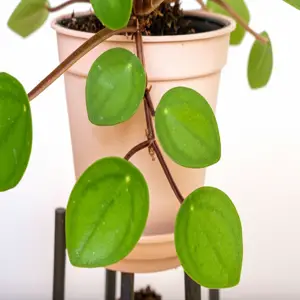
pilea leaf propagation
Scientific Background (Simplified)
Plant propagation hinges on the concept of plant hormones, particularly auxins and cytokinins. Auxins primarily promote root growth, while cytokinins stimulate shoot (stem and leaf) development. In leaf propagation, the goal is to encourage the leaf to produce both roots (through auxin stimulation) and a new plantlet (through cytokinin stimulation, which is often the bottleneck). Factors such as light, humidity, and temperature influence the balance of these hormones within the plant tissue.
Read More: About 5 Indoor Plant Watering Tips You Need to Know (2025)
Materials You’ll Need
Before you start, gather the following materials:
- Healthy Pilea Leaves: Choose mature, healthy leaves from your Pilea plant. Avoid leaves that are damaged, yellowing, or showing signs of disease.
- Sharp, Clean Knife or Scissors: A sterilized cutting tool is essential to prevent infection.
- Water or Propagation Medium: You can use water, sphagnum moss, perlite, vermiculite, or a well-draining potting mix.
- Clear Container or Propagation Tray: For water propagation, a glass or jar is ideal. For other mediums, a propagation tray or small pots will work.
- Rooting Hormone (Optional): Rooting hormone can help stimulate root growth, but it’s not always necessary. It can increase the likelihood of success, especially for more challenging propagations. Look for rooting hormones containing Indole-3-acetic acid (IAA) or Indole-3-butyric acid (IBA).
- Spray Bottle: For misting the leaves and maintaining humidity.
- Plastic Bag or Humidity Dome (Optional): To create a humid environment.
- Well-Draining Potting Mix: For potting the rooted leaves. A mix of perlite, coco coir, and potting soil works well.
- Labels: To keep track of your propagation efforts.
Safety First: Always sterilize your cutting tools with rubbing alcohol or a diluted bleach solution before use to prevent the spread of disease to your plants.
Step-by-Step Guide: Propagating Pilea Leaves
There are two main methods for propagating Pilea leaves: water propagation and soil propagation. Let’s explore each method in detail.
Method 1: Water Propagation
Water propagation is a popular method for many houseplants because it allows you to visually monitor root development. However, with Pilea leaves, it’s crucial to remember that roots are only half the battle. You also need a new plantlet to emerge.
Step 1: Selecting and Preparing the Leaf
Choose healthy, mature leaves from your Pilea plant. The larger the leaf, the more energy it has to support root and plantlet development. Using your sterilized knife or scissors, carefully cut the leaf off the stem, leaving a small portion of the petiole (the stalk that connects the leaf to the main stem) attached – about 1-2 inches. This petiole is where the roots will emerge.
Tip: Some propagators advocate for cutting the leaf in half horizontally, believing it can stimulate hormone production and increase the chances of new growth. This is anecdotal, but you can experiment with a few leaves to see if it works for you. If you do this, allow the cut end to callous over for a day or two before placing it in water.
Step 2: Placing the Leaf in Water
Fill a clean glass or jar with water. Make sure the water is clean and free of chlorine (let tap water sit out for 24 hours or use filtered water). Place the petiole of the leaf in the water, ensuring that the leaf itself remains above the waterline. You can use toothpicks or a propagation lid to suspend the leaf if needed. The goal is to keep the petiole submerged without the leaf rotting.
Trend Watch: In 2025, there’s a growing trend of using aesthetically pleasing propagation stations. These often involve glass tubes or vases specifically designed to hold cuttings while allowing you to showcase the developing roots. This combines the practicality of propagation with a decorative element.
Step 3: Providing the Right Environment
Place the jar in a location with bright, indirect light. Avoid direct sunlight, which can scorch the leaf. A warm environment (around 65-75°F or 18-24°C) is ideal for root development. Change the water every 3-5 days to keep it fresh and prevent the growth of algae or bacteria. Monitor the water level and add more as needed.
Step 4: Patience is Key
Root development can take several weeks, sometimes even a month or more. Be patient and continue to provide fresh water and bright, indirect light. Once the roots are about an inch long, you can consider potting the leaf.
Step 5: The Critical Step: Waiting for a Plantlet
This is the most challenging part of Pilea leaf propagation. Just because a leaf roots doesn’t guarantee it will produce a new plantlet. You’re looking for tiny leaves to emerge from the base of the petiole. This can take weeks, or even months. If no plantlet emerges after a significant period (2-3 months), the leaf might simply root and remain as a rooted leaf without ever producing a new plant. It’s not necessarily a failure; it just means the leaf didn’t have the necessary resources or hormonal signals to develop a new growth point.
Troubleshooting: If the leaf starts to rot, remove it immediately to prevent the spread of rot to other leaves (if you’re propagating multiple leaves simultaneously). Ensure the leaf itself is not submerged in water.
Step 6: Potting the Rooted Leaf (with Plantlet!)
Once a plantlet has emerged and grown to a reasonable size (at least a few small leaves), it’s time to pot the rooted leaf. Choose a small pot with drainage holes and fill it with a well-draining potting mix. Gently remove the rooted leaf from the water and plant it in the pot, ensuring the roots are covered with soil. Water thoroughly after planting.
Step 7: Ongoing Care
Provide the newly potted Pilea with bright, indirect light and water when the top inch of soil feels dry. Avoid overwatering, which can lead to root rot. Fertilize sparingly with a diluted balanced fertilizer every 2-4 weeks during the growing season (spring and summer).
Method 2: Soil Propagation
Soil propagation involves rooting the leaf directly in a suitable growing medium. This method can be advantageous because it avoids the transition from water to soil, which can sometimes be stressful for plants.
Step 1: Preparing the Leaf and Medium
Follow the same steps as in water propagation for selecting and preparing the leaf. Choose a well-draining potting mix such as a blend of perlite, coco coir, and potting soil. Moisten the medium thoroughly before planting.
Step 2: Planting the Leaf
Make a small hole in the moistened potting mix and insert the petiole of the leaf into the hole. Gently firm the soil around the petiole to secure the leaf in place. You can also dip the cut end of the petiole in rooting hormone before planting to encourage root development (optional).
Step 3: Creating a Humid Environment
Humidity is crucial for successful soil propagation. Cover the pot with a plastic bag or place it in a humidity dome to create a greenhouse-like environment. This helps to prevent the leaf from drying out and encourages root development. Make sure to provide adequate ventilation to prevent mold growth.
Step 4: Providing the Right Environment
Place the pot in a location with bright, indirect light. Avoid direct sunlight. Maintain a warm temperature (around 65-75°F or 18-24°C). Mist the soil regularly to keep it moist, but avoid overwatering. Lift the plastic bag or humidity dome every few days to allow for air circulation.
Step 5: Waiting for Roots and a Plantlet
As with water propagation, patience is key. Root development can take several weeks. After a few weeks, gently tug on the leaf to check for resistance, which indicates root growth. You’re also looking for signs of new growth – tiny leaves emerging from the base of the petiole. If no plantlet emerges after a reasonable period (2-3 months), the leaf may not produce a new plant.
Step 6: Removing the Humidity Cover and Ongoing Care
Once a plantlet has emerged and is actively growing, gradually remove the humidity cover over a period of a few days to acclimate the new plant to the ambient humidity levels. Continue to provide bright, indirect light and water when the top inch of soil feels dry. Fertilize sparingly during the growing season.
Comparative Table: Water vs. Soil Propagation
| Feature | Water Propagation | Soil Propagation |
|---|---|---|
| Root Visibility | Roots are visible, allowing you to monitor development. | Roots are not visible until you gently check for resistance. |
| Transition Stress | Requires a transition from water to soil, which can sometimes stress the plant. | No transition needed, reducing potential stress. |
| Humidity Management | Less critical, as the leaf is in water. | Requires careful humidity management to prevent drying out. |
| Risk of Rot | Higher risk of rot if the leaf is submerged or the water is not changed regularly. | Lower risk of rot if the soil is well-draining and not overwatered. |
| Success Rate (Anecdotal) | Potentially slightly lower, as the transition to soil can be challenging. | Potentially slightly higher, as the plant roots directly in soil. |
| Ease of Monitoring Plantlet Growth | More challenging to see the plantlet emergence. | Easier to see the plantlet emergence. |
Optimizing Your Propagation Efforts: Tips and Tricks
To increase your chances of success with Pilea leaf propagation, consider these tips and tricks:
- Choose the Right Leaves: Select mature, healthy leaves that are free from damage or disease. Avoid using very young or very old leaves, as they may not have the necessary energy reserves.
- Sterilize Your Tools: Always use a sharp, clean knife or scissors to prevent the spread of disease.
- Use Rooting Hormone (Optional): Rooting hormone can help stimulate root growth, especially for leaves that are slow to root.
- Provide Adequate Light: Bright, indirect light is essential for both root and plantlet development.
- Maintain Humidity: High humidity helps to prevent the leaf from drying out and encourages root growth.
- Be Patient: Pilea leaf propagation can take several weeks or even months. Don’t give up if you don’t see results immediately.
- Experiment: Try different methods and techniques to see what works best for you. Some propagators have success with rooting leaves in perlite or vermiculite.
- Consider Bottom Heat: Using a heat mat can speed up the rooting process by providing consistent warmth to the soil.
- Ventilation: If using a humidity dome or plastic bag, ensure adequate ventilation to prevent fungal growth.
- Don’t Overwater: Overwatering can lead to root rot, which can kill the leaf. Allow the soil to dry out slightly between waterings.
Troubleshooting Common Problems
Even with the best efforts, you may encounter some challenges when propagating Pilea leaves. Here are some common problems and how to address them:
- Leaf Rotting: This is usually caused by overwatering or poor ventilation. Remove the rotting leaf immediately and ensure that the soil is well-draining and that there is adequate air circulation. Avoid getting the leaf wet when watering.
- No Root Development: This could be due to insufficient light, low humidity, or unhealthy leaves. Ensure that the leaf is receiving bright, indirect light and that the humidity is high. Try using rooting hormone to stimulate root growth.
- Roots Develop, But No Plantlet: This is a common issue with Pilea leaf propagation. It could be due to a lack of energy reserves in the leaf or a hormonal imbalance. Be patient and continue to provide the right conditions. You can also try cutting the leaf in half horizontally to stimulate hormone production.
- Slow Growth: This could be due to insufficient light, low humidity, or a lack of nutrients. Ensure that the plant is receiving bright, indirect light and that the humidity is high. Fertilize sparingly during the growing season.
- Fungal Growth: This is usually caused by excessive humidity and poor ventilation. Ensure adequate air circulation by lifting the humidity dome or plastic bag regularly. You can also use a fungicide to control fungal growth.
Pilea Care After Propagation
Once your propagated Pilea has established roots and is actively growing, it’s important to provide the right care to ensure its continued health and growth.
Light
Pilea peperomioides thrive in bright, indirect light. Avoid direct sunlight, which can scorch the leaves. An east- or west-facing window is ideal. If you don’t have access to natural light, you can supplement with a grow light.
Water
Water your Pilea when the top inch of soil feels dry. Avoid overwatering, which can lead to root rot. Allow the soil to dry out slightly between waterings. During the winter months, you can reduce watering frequency.
Humidity
While Pileas can tolerate average humidity levels, they prefer slightly higher humidity. You can increase humidity by misting the plant regularly, placing it on a pebble tray filled with water, or using a humidifier.
Temperature
Pileas prefer temperatures between 65-75°F (18-24°C). Avoid exposing them to extreme temperatures or drafts.
Soil
Use a well-draining potting mix. A mix of perlite, coco coir, and potting soil works well. You can also add a small amount of compost to provide nutrients.
Fertilizer
Fertilize sparingly during the growing season (spring and summer) with a diluted balanced fertilizer. Avoid fertilizing during the winter months.
Repotting
Repot your Pilea every 1-2 years, or when it becomes root-bound. Choose a pot that is slightly larger than the previous one. Use a fresh potting mix when repotting.
Pruning
Prune your Pilea to maintain its shape and encourage bushier growth. You can also remove any yellowing or damaged leaves.
The Legal and Ethical Considerations
While propagating Pilea peperomioides is generally permissible for personal use, it’s essential to be aware of some legal and ethical considerations, especially if you plan to sell or distribute propagated plants on a larger scale.
Plant Patents and Trademarks
While the standard Pilea peperomioides is not patented, newer cultivars or variations might be. Plant patents protect new and distinct plant varieties, preventing others from commercially propagating or selling them without permission from the patent holder. Before propagating and selling large quantities of a particular Pilea variety, it’s prudent to check if it’s protected by a plant patent. Similarly, trademarks can protect the plant’s name or branding, preventing others from using the same name for their plants.
Plant Health Regulations
Many countries and regions have plant health regulations to prevent the spread of pests and diseases. If you’re planning to ship or sell propagated Pilea plants across state or national borders, you may need to obtain a phytosanitary certificate to ensure that your plants are free from pests and diseases. This certificate verifies that the plants have been inspected and meet the import requirements of the destination country or region. Always check with your local agricultural authorities for the most up-to-date regulations.
Ethical Sourcing and Propagation
Ethical sourcing is becoming increasingly important in the plant industry. Ensure that your initial Pilea plant was obtained from a reputable source that adheres to sustainable and ethical practices. Avoid purchasing plants from sources that may be involved in illegal plant collection or trade. When propagating your own plants, strive to minimize waste and use environmentally friendly practices. Consider using organic potting mix and avoiding the use of harmful pesticides or herbicides.
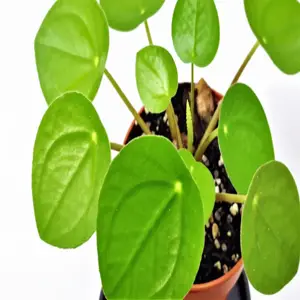
pilea peperomioides leaf
Community and Sharing
While commercial propagation may have legal considerations, sharing your propagated Pilea plants with friends, family, and your local community is a wonderful way to spread the joy of plant parenthood. Consider participating in local plant swaps or sharing cuttings with other plant enthusiasts. This fosters a sense of community and promotes plant biodiversity.
Pilea in the Context of 2025 Plant Trends
The popularity of Pilea peperomioides continues to surge in 2025, fitting into several key trends shaping the indoor plant landscape:
- Biophilic Design: The incorporation of natural elements into indoor spaces is a major trend, with plants like Pilea playing a central role in creating calming and restorative environments. The unique foliage and easy-care nature of Pilea make it an ideal choice for bringing nature indoors.
- Sustainable Living: As mentioned earlier, propagation aligns perfectly with the desire to reduce consumption and live more sustainably. Growing your own Pilea plants from cuttings reduces the need to purchase new plants, minimizing your environmental footprint.
- Plantfluencers and Social Media: Social media platforms like Instagram, TikTok, and YouTube have played a significant role in popularizing Pilea peperomioides. Plantfluencers showcase their beautiful Pilea collections and share propagation tips, inspiring others to cultivate these plants.
- Low-Maintenance Plants: In today’s busy world, people are seeking plants that are easy to care for and don’t require a lot of attention. Pilea fits the bill perfectly, thriving in bright, indirect light and requiring minimal watering.
- Unique Foliage and Textures: The coin-shaped leaves of Pilea peperomioides add visual interest and texture to any indoor space. The plant’s unusual appearance makes it a conversation starter and a focal point in home decor.
Pilea and Feng Shui
Pilea peperomioides is often associated with good luck and prosperity in Feng Shui. Its round, coin-shaped leaves are said to attract wealth and positive energy. Placing a Pilea plant in your home or office is believed to promote financial well-being and create a harmonious environment. While the benefits are largely symbolic, incorporating plants like Pilea into your living space can certainly contribute to a more positive and aesthetically pleasing atmosphere.
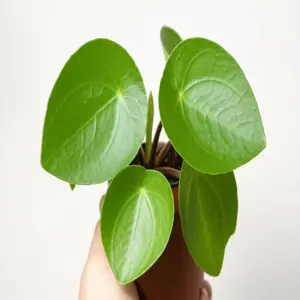
rooting pilea leaves
Statistics on Houseplant Ownership in 2025
The houseplant market continues to experience significant growth in 2025. Here are some key statistics that highlight the increasing popularity of indoor gardening:
- Market Size: The global indoor plant market is projected to reach billions of dollars by 2027, with a compound annual growth rate (CAGR) of several percentage points. This growth is driven by increasing urbanization, rising disposable incomes, and a growing awareness of the health benefits of indoor plants.
- Demographics: Millennials and Gen Z are the primary drivers of the houseplant boom. These generations are more likely to live in urban areas, rent apartments, and prioritize experiences over material possessions. Plants offer a way to connect with nature and create a sense of well-being in their limited living spaces.
- Popular Plant Varieties: While Pilea peperomioides remains a popular choice, other trending houseplants include snake plants, ZZ plants, monsteras, and pothos. These plants are prized for their easy care, air-purifying properties, and aesthetic appeal.
- Online Sales: Online sales of houseplants have surged in recent years, making it easier than ever to purchase plants from the comfort of your home. Many nurseries and plant retailers now offer online ordering and delivery services.
- Mental Health Benefits: Studies have shown that indoor plants can reduce stress, improve mood, and enhance cognitive function. The act of caring for plants can be therapeutic and provide a sense of purpose.
Read More: About What Do Plants Do at Night?
FAQ: Common Questions About Pilea Leaf Propagation
Here are some frequently asked questions about propagating Pilea peperomioides from leaves:
Why is my Pilea leaf turning yellow?
Yellowing leaves can be caused by several factors, including overwatering, underwatering, insufficient light, or nutrient deficiencies. Check the soil moisture and ensure that the plant is receiving adequate light. If the problem persists, consider fertilizing with a diluted balanced fertilizer. Also, yellowing can happen as the leaf puts all its energy into producing roots and a plantlet, so it’s not always a sign of failure.
How long does it take for a Pilea leaf to root?
Rooting time can vary depending on environmental conditions and the health of the leaf. Generally, it takes several weeks to a month or more for roots to develop. Be patient and provide the right conditions to encourage root growth.
Can I propagate Pilea leaves without rooting hormone?
Yes, you can propagate Pilea leaves without rooting hormone. Rooting hormone can help stimulate root growth, but it’s not always necessary. Many leaves will root successfully without it.
What is the best medium for propagating Pilea leaves?
You can propagate Pilea leaves in water, sphagnum moss, perlite, vermiculite, or a well-draining potting mix. Each medium has its advantages and disadvantages. Experiment to see what works best for you.
How do I know if my Pilea leaf is ready to be potted?
A Pilea leaf is ready to be potted once it has developed roots that are about an inch long and has produced a small plantlet (tiny leaves emerging from the base of the petiole).
Why isn’t my Pilea leaf producing a new plantlet?
This is a common issue with Pilea leaf propagation. It could be due to a lack of energy reserves in the leaf or a hormonal imbalance. Be patient and continue to provide the right conditions. You can also try cutting the leaf in half horizontally to stimulate hormone production.
How much light do Pilea leaves need during propagation?
Pilea leaves need bright, indirect light during propagation. Avoid direct sunlight, which can scorch the leaves.
How often should I water Pilea leaves during propagation?
If propagating in water, change the water every 3-5 days. If propagating in soil, mist the soil regularly to keep it moist, but avoid overwatering.
Is it better to propagate Pilea leaves in water or soil?
Both water and soil propagation can be successful. Water propagation allows you to monitor root development, while soil propagation avoids the transition from water to soil. Experiment to see what works best for you. Ultimately, the best method is the one that yields a new plantlet, not just roots.
What do I do if my Pilea leaf starts to rot?
If your Pilea leaf starts to rot, remove it immediately to prevent the spread of rot to other leaves. Ensure that the soil is well-draining and that there is adequate air circulation. Avoid getting the leaf wet when watering.
Conclusion: Final Thoughts on Pilea Leaf Propagation
Propagating Pilea peperomioides from leaves can be a rewarding but sometimes challenging endeavor. While not as straightforward as pup propagation, it offers a unique opportunity to expand your plant collection and learn more about the fascinating world of plant reproduction. Remember that patience is key, and success is not always guaranteed. Even if some leaves fail to produce new plantlets, the experience of experimenting and observing plant growth is valuable in itself.
In 2025, with the growing interest in sustainable living and indoor gardening, propagating your own plants is more relevant than ever. The ability to create new life from a single leaf is a testament to the resilience and adaptability of plants. By following the steps and tips outlined in this guide, you can increase your chances of success and enjoy the satisfaction of nurturing new Pilea plants from leaves. Whether you choose water or soil propagation, remember to provide the right environment, maintain adequate humidity, and be patient. Don’t be afraid to experiment and adapt your techniques to suit your specific conditions. And, most importantly, have fun!
As you embark on your Pilea leaf propagation journey, remember to share your experiences with other plant enthusiasts. Connect with online communities, participate in local plant swaps, and share your tips and tricks. Together, we can foster a vibrant community of plant lovers and promote sustainable practices in the world of indoor gardening. And while you’re at it, consider exploring other methods of Pilea propagation, such as propagating from stem cuttings or offsets. The more you learn about plant propagation, the more rewarding your gardening experience will become.
In conclusion, while Pilea leaf propagation requires patience and a bit of luck, the potential reward of creating new plants from a single leaf makes it a worthwhile pursuit for any plant enthusiast in 2025 and beyond. Happy propagating!
Auto Amazon Links: No products found.

1 Premium Watering Bag 20 Gallons PVC UV Resistant Slow Release Watering Tree Bag in Green Visit The baumbad Store (1, 20 Gallons)
$17.99 (as of June 7, 2026 22:51 GMT +00:00 - More info- Product prices and availability are accurate as of the date/time indicated and are subject to change. Any price and availability information displayed on [relevant Amazon Site(s), as applicable] at the time of purchase will apply to the purchase of this product.

VEVOR Tree Watering Bag Slow Release, 4 Pack 20 Gallons Tree Watering Bags/Ring, Reusable Refillable Tree Irrigation Ring Water Bags, Heavy Duty Watering System for Shrub Tree Root Drip Irrigation
$39.90 (as of June 7, 2026 22:51 GMT +00:00 - More info- Product prices and availability are accurate as of the date/time indicated and are subject to change. Any price and availability information displayed on [relevant Amazon Site(s), as applicable] at the time of purchase will apply to the purchase of this product.

20 Gallon Tree Water Bags, Slow Release Watering Bag System - Gator Style Ring for New Trees,Treegator Bags for Drip Irrigation, Fruit Protection, Tree Storage (3 Pack)
$26.99 (as of June 7, 2026 22:51 GMT +00:00 - More info- Product prices and availability are accurate as of the date/time indicated and are subject to change. Any price and availability information displayed on [relevant Amazon Site(s), as applicable] at the time of purchase will apply to the purchase of this product.
Slow Release Ring-Style Tree Watering Bag - 15 Gallon Watering Ring for Trees, Discipline Essentials (8 Pack, Brown/Black)
$89.90 (as of June 7, 2026 22:51 GMT +00:00 - More info- Product prices and availability are accurate as of the date/time indicated and are subject to change. Any price and availability information displayed on [relevant Amazon Site(s), as applicable] at the time of purchase will apply to the purchase of this product.

REMIAWY Tree Watering Bag 20 Gallon Watering Bag for Trees with Heavy Duty Zipper Premium PVC Slow Release Drippers (5-8 Hours Releasing Time)
$14.99 (as of June 7, 2026 22:51 GMT +00:00 - More info- Product prices and availability are accurate as of the date/time indicated and are subject to change. Any price and availability information displayed on [relevant Amazon Site(s), as applicable] at the time of purchase will apply to the purchase of this product.
TERRO T300B Liquid Ant Killer Bait Stations 12-Pack - Indoor Ant Traps with Borax Formula, Kills the Queen & the Entire Colony
$9.86 (as of June 8, 2026 11:05 GMT +00:00 - More info- Product prices and availability are accurate as of the date/time indicated and are subject to change. Any price and availability information displayed on [relevant Amazon Site(s), as applicable] at the time of purchase will apply to the purchase of this product.
Zevo Flying Insect Trap & 3 Refill Cartridges - Plug in Fly Trap & Indoor Bug Catcher for Gnats, House & Fruit Flies - Blue & UV Light Technology, Mess-Free Alternative to Bug Zapper
$25.96 (as of June 8, 2026 11:05 GMT +00:00 - More info- Product prices and availability are accurate as of the date/time indicated and are subject to change. Any price and availability information displayed on [relevant Amazon Site(s), as applicable] at the time of purchase will apply to the purchase of this product.
Zevo Flying Insect Trap Official Refill Cartridges - Fits Both Zevo Trap & MAX Indoor Fly Trap - Authentic Trap+Lock Technology to Catch Gnats, House & Fruit Flies (4 Official Refill Cartridges)
$14.97 (as of June 8, 2026 11:05 GMT +00:00 - More info- Product prices and availability are accurate as of the date/time indicated and are subject to change. Any price and availability information displayed on [relevant Amazon Site(s), as applicable] at the time of purchase will apply to the purchase of this product.
Summit...responsible solutions 110-12 Mosquito Dunks, 6-Pack
$8.58 (as of June 8, 2026 11:05 GMT +00:00 - More info- Product prices and availability are accurate as of the date/time indicated and are subject to change. Any price and availability information displayed on [relevant Amazon Site(s), as applicable] at the time of purchase will apply to the purchase of this product.
HOME GROWN Zinnia Dahlia Seeds Pack for 2026 Non GMO 524 Flower Seeds | Vibrant Zinnia Elegans for Pollinator Gardens, Borders & Containers | Easy-to-Grow Outdoor Blooms
$7.99 (as of June 8, 2026 11:05 GMT +00:00 - More info- Product prices and availability are accurate as of the date/time indicated and are subject to change. Any price and availability information displayed on [relevant Amazon Site(s), as applicable] at the time of purchase will apply to the purchase of this product.