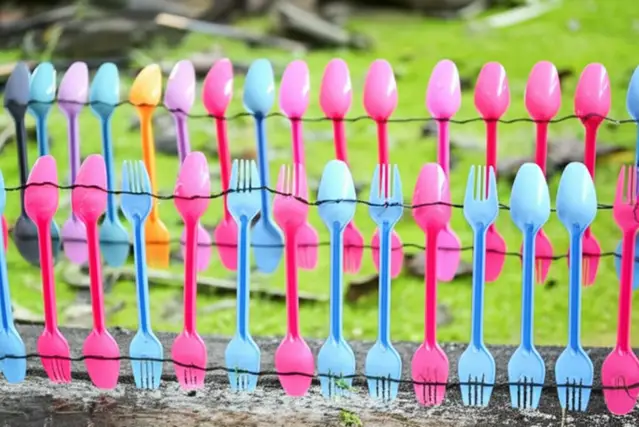
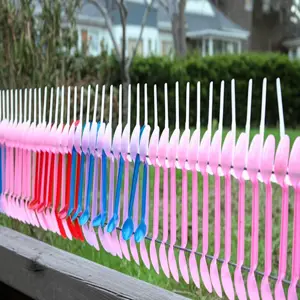
Looking for a creative and cost-effective way to add a border to your garden? A DIY garden fence with plastic spoons is a fantastic solution! This upcycling project is not only budget-friendly but also adds a unique, whimsical touch to your outdoor space. Instead of throwing away those plastic spoons, transform them into a charming garden feature that protects your plants and enhances your garden’s aesthetic.
In this comprehensive guide, we’ll walk you through the process of creating your own plastic spoon garden fence, from gathering materials to installing the final product. We’ll also explore various design ideas and address common questions to ensure your project is a success. Get ready to unleash your creativity and give your garden a delightful makeover!
Why Choose a Plastic Spoon Garden Fence?
Before diving into the how-to, let’s consider why a plastic spoon fence might be the perfect choice for your garden:
- Eco-Friendly: Upcycling plastic spoons helps reduce waste and gives new life to materials that would otherwise end up in a landfill.
- Cost-Effective: Plastic spoons are often inexpensive, especially if you collect them from takeout orders or parties. This makes it a budget-friendly alternative to traditional fencing.
- Unique Aesthetic: A plastic spoon fence offers a quirky and playful look that stands out from conventional garden borders.
- Easy to Customize: You can paint the spoons in various colors, arrange them in different patterns, and adjust the height and length of the fence to suit your garden’s needs.
- Simple to Install: The project is relatively simple and doesn’t require advanced tools or skills, making it accessible to gardeners of all levels.
Materials You’ll Need
To embark on your DIY garden fence with plastic spoons project, gather the following materials:
- Plastic Spoons: The quantity depends on the length of your desired fence. Start collecting well in advance!
- Wooden Stakes or Dowels: These will serve as the fence posts. Choose a height that suits your garden and desired fence height.
- Landscape Fabric or Heavy-Duty Plastic Sheeting: This will act as a backing for the spoons and provide stability.
- Staple Gun and Staples: To attach the spoons to the landscape fabric.
- Scissors or Utility Knife: For cutting the landscape fabric and spoons if needed.
- Measuring Tape: To ensure accurate spacing and dimensions.
- Paint (Optional): If you want to add color to your fence, choose outdoor-rated paint suitable for plastic.
- Hammer or Mallet: To drive the wooden stakes into the ground.
- Gloves: To protect your hands during the project.
- Safety Glasses: To protect your eyes, especially when using a staple gun or cutting tools.
Step-by-Step Guide to Building Your Plastic Spoon Fence
Now, let’s get to the fun part! Follow these detailed steps to create your very own DIY garden fence with spoons.
Step 1: Preparing the Spoons
Before assembling the fence, you need to prepare the plastic spoons. This involves cleaning, trimming (optional), and painting (optional).
- Cleaning: Wash the plastic spoons thoroughly with soap and water to remove any dirt or residue. Allow them to dry completely.
- Trimming (Optional): If desired, trim the handles of the spoons to a uniform length or remove them entirely. This can create a neater and more consistent look. A utility knife or heavy-duty scissors can be used for this. Be careful when using sharp tools.
- Painting (Optional): If you want to add color to your fence, now is the time to paint the spoons. Choose outdoor-rated paint that is suitable for plastic. Apply one or two coats, allowing the paint to dry completely between coats. Consider using different colors for a vibrant and playful effect.
Step 2: Preparing the Landscape Fabric
The landscape fabric serves as the foundation for your fence. Cut it to the desired height and length, ensuring it is sturdy enough to support the plastic spoons.
- Measuring: Measure the length of the area where you want to install the fence. Add a few extra inches to account for overlap and securing the fabric to the stakes.
- Cutting: Cut the landscape fabric to the desired length and height. A good height for a small garden fence is typically between 12 and 18 inches.
- Reinforcing (Optional): For added durability, you can fold over the top edge of the landscape fabric and staple it to create a reinforced hem.
Step 3: Attaching the Spoons to the Landscape Fabric
This is where your design starts to take shape! Attach the plastic spoons to the landscape fabric in a pattern that you find appealing.
- Layout: Lay the landscape fabric flat on a work surface. Arrange the plastic spoons in the desired pattern. You can overlap the spoons slightly to create a denser fence or space them out for a more open look.
- Securing: Use a staple gun to attach the spoons to the landscape fabric. Place the staples near the base of the spoon bowls, ensuring they are securely fastened.
- Pattern: Continue attaching spoons until the entire length of the landscape fabric is covered. You can create various patterns, such as horizontal rows, vertical columns, or a staggered arrangement.
Design Tip: Experiment with different spoon orientations and colors to create unique patterns. For instance, alternate the direction of the spoon bowls or create a gradient effect with different shades of paint.
Step 4: Installing the Fence Posts
The wooden stakes or dowels will provide support for your plastic spoon fence. Space them evenly along the fence line to ensure stability.
- Spacing: Determine the spacing between the fence posts. A good rule of thumb is to place them every 2 to 3 feet.
- Driving: Use a hammer or mallet to drive the wooden stakes into the ground at the designated intervals. Make sure the stakes are deep enough to provide adequate support.
- Alignment: Ensure the stakes are aligned and evenly spaced. Use a measuring tape to maintain consistent distances.
Step 5: Attaching the Fence to the Posts
With the fence posts in place, it’s time to attach the plastic spoon fence to the stakes. This will complete your DIY garden fence with plastic spoons.
- Positioning: Align the landscape fabric with the wooden stakes. Make sure the fence is at the desired height and level.
- Securing: Use a staple gun to attach the landscape fabric to the wooden stakes. Place the staples along the top and bottom edges of the fabric, ensuring it is securely fastened.
- Reinforcing: For added stability, you can wrap the landscape fabric around the stakes and staple it on the back.
Pro Tip: If you’re concerned about the staples being visible, you can cover them with decorative trim or paint them to match the color of the spoons or stakes.
Design Ideas for Your Plastic Spoon Fence
One of the best things about a DIY garden fence with plastic spoons is the opportunity for customization. Here are some design ideas to inspire your project:
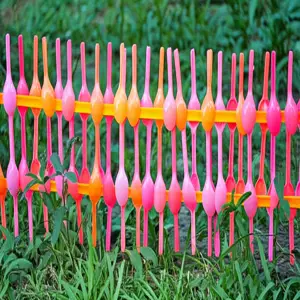
- Color Coordination: Paint the spoons in colors that complement your garden’s flowers and foliage. Consider using a color palette that reflects the seasons.
- Pattern Play: Experiment with different spoon arrangements to create unique patterns. Try alternating the direction of the spoons, creating chevron patterns, or arranging them in a mosaic-like design.
- Height Variation: Vary the height of the fence by trimming the spoons to different lengths or staggering the rows. This can add visual interest and create a more dynamic look.
- Themed Fences: Create a themed fence based on a particular motif or style. For example, you could create a beach-themed fence with blue and white spoons or a whimsical fairy garden fence with pastel colors.
- Embellishments: Add embellishments to your fence, such as beads, buttons, or small garden ornaments. These can add a touch of personality and make your fence even more unique.
Maintaining Your Plastic Spoon Fence
To keep your DIY garden fence with plastic spoons looking its best, follow these maintenance tips:
- Cleaning: Periodically clean the fence with soap and water to remove dirt and debris. A soft brush or sponge can be used to gently scrub the spoons.
- Repainting: If the paint starts to fade or chip, repaint the spoons as needed. Choose a high-quality outdoor-rated paint to ensure long-lasting color.
- Repairs: Check the fence regularly for loose or damaged spoons. Replace any broken spoons and re-staple any loose ones.
- Winter Protection: In areas with harsh winters, consider removing the fence and storing it indoors to protect it from the elements. This can prolong its lifespan and prevent damage from snow and ice.
Alternative Materials and Techniques
While plastic spoons are a popular choice for this type of fence, you can also use other materials and techniques to achieve a similar effect. Here are a few alternatives:
- Plastic Forks or Knives: Use plastic forks or knives instead of spoons for a different texture and appearance.
- Wooden Spoons: For a more rustic look, use wooden spoons instead of plastic ones. These can be stained or painted to match your garden’s aesthetic.
- Bottle Caps: Collect bottle caps and attach them to the landscape fabric in a similar manner to the spoons. This can create a colorful and eye-catching fence.
- CDs or DVDs: Recycle old CDs or DVDs by cutting them into shapes and attaching them to the landscape fabric. This can create a shimmering and reflective fence that adds a touch of glamour to your garden.
- Metal Wire: Use metal wire to create a more durable and long-lasting fence. Wrap the wire around the stakes and attach the spoons or other materials to the wire.
Extending Your Garden’s Charm
Now that you have your DIY garden fence with plastic spoons, why not explore other ways to enhance your garden’s beauty and functionality? Consider these additional projects:
- DIY Garden Markers: Create personalized garden markers using stones, wood, or metal. Label your plants with their names and planting dates for easy identification.
- Upcycled Planters: Transform old containers, such as tires, buckets, or watering cans, into unique planters. These can add a touch of whimsy and personality to your garden.
- Composting System: Start a composting system to recycle kitchen scraps and yard waste into nutrient-rich soil. This is a sustainable way to improve your garden’s health and reduce waste. You can learn more about this from this guide to making homemade compost.
- Rainwater Harvesting: Collect rainwater in barrels or tanks to use for watering your plants. This can conserve water and reduce your water bill.
- Attracting Wildlife: Plant flowers and shrubs that attract pollinators, such as bees and butterflies. You can also install bird feeders and birdhouses to create a welcoming habitat for birds. Consider some of the best plants for attracting hummingbirds.
Remember, gardening is a journey, not a destination. Enjoy the process of creating and nurturing your outdoor space, and don’t be afraid to experiment and try new things!
Planting Considerations Near Your New Fence
When you have your new fence in place, it is important to know what to plant nearby. Here are a few examples of plants to consider:
- Basil: Basil is a popular herb that can be easily grown in a garden. For those new to gardening, learning how to grow basil in a mason jar from seeds is a great start. If you’re looking to extend the basil growing season, you might also want to check out basil winter care tips.
- Dill: Another easy-to-grow herb, dill can thrive even in unconventional containers. You can learn how to grow dill in a chipped bowl, making it a versatile choice for any garden.
- Snake Plants: For those interested in indoor gardening, snake plants are a great option. Knowing the best soil for propagating snake plants can greatly improve your success. Also, understanding how fast do snake plants grow can help you set realistic expectations.
- Aloe Vera: Aloe vera is another popular succulent that’s easy to care for. Just be mindful of the yellow liquid in aloe vera, which is a natural part of the plant but can be a bit surprising if you’re not expecting it. Also, be aware if do aloe plants like direct sunlight.
- Monstera: Monsteras are trendy houseplants known for their unique leaves. If you’re wondering about their care, you might ask, can monstera live outside? It’s also helpful to know can monstera get sunburn, especially if you’re new to growing them. Additionally, understanding when do monstera leaves start to split can help you appreciate their growth process.
- Pothos: Pothos are versatile plants that can thrive indoors or outdoors. Understanding if can pothos live outside is crucial for proper care.
Seasonal Gardening Tips
As you continue your gardening journey, consider these seasonal tips to keep your plants healthy and thriving:
- Winter: During winter, it’s important to know what does a gardener do in the winter. Winter preparation is key to a successful spring garden.
- Propagating: Spring is an excellent time for how to propagate plants from cuttings. Starting new plants from cuttings can expand your garden without additional costs.
- Tomatoes: When planting tomatoes, it’s good to know when to plant tomatoes. Timing is everything when it comes to a successful tomato harvest.
- Terrariums: For indoor gardening, terrarium madness can be a fun and creative project.
Specific Plant Care Advice
For specific plant care, consider these tips:
- Money Tree: If you are interested in growing a money tree, learn how to grow and propagate money tree.
- Spider Plant: To maximize your spider plant’s potential, check out how to make more spider plant babies.
- Pothos: To achieve fuller pothos plants, explore how to make pothos fuller.
- Snake Plant: Discover the secrets to growing tall snake plants by checking out how to make snake plant grow tall.
- Peace Lily: If you need to repot your peace lily, you can consult how to repot peace lily.
Additional Gardening Tips
- Apartment Gardening: If you have limited space, consider gardening in an apartment without a balcony.
- Wildflowers: If you’re interested in wildflowers, here are pros and cons of planting wildflowers.
- Hydroponics: For an alternative growing method, learn how to start seeds for hydroponics.
FAQ Section
How many plastic spoons do I need for a garden fence?
What type of paint should I use to paint the plastic spoons?
How do I prevent the plastic spoons from fading in the sun?
What is the best way to clean the plastic spoon fence?
How can I make the fence more durable and weather-resistant?
Can I use biodegradable plastic spoons for this project?
How high should I make the garden fence?
How far apart should I space the fence posts?
What other materials can I use instead of landscape fabric?
How can I incorporate lighting into my plastic spoon fence?
Conclusion
Creating a DIY garden fence with plastic spoons is a rewarding and environmentally conscious project that adds a unique touch to your garden. By following these steps and design ideas, you can transform ordinary plastic spoons into a charming and functional garden feature. Remember to maintain your fence regularly to ensure it lasts for years to come.
As you cultivate your garden, keep in mind that proper soil health and plant care are essential for thriving plants. Whether you’re planting an amaryllis, strawberry plants or exploring the orchids, each plant has its own unique needs. Embrace the journey of learning and experimentation, and let your garden be a reflection of your creativity and passion.
With a little imagination and effort, your garden can become a beautiful and sustainable oasis. Whether you’re battling dandelions, or creating a terrarium, every project adds to the beauty of the garden. Remember to take care of tomato plants, and learn how to grow herbs indoors year-round. Happy gardening!
Auto Amazon Links: No products found.
Perfect Plants Christmas Tree Saver 8oz. | Easy Use Xmas Tree Preserver Food | Have Healthy Green Christmas Trees All Holiday Season
$13.99 (as of January 10, 2026 17:18 GMT +00:00 - More info- Product prices and availability are accurate as of the date/time indicated and are subject to change. Any price and availability information displayed on [relevant Amazon Site(s), as applicable] at the time of purchase will apply to the purchase of this product.
Wilt-Pruf® Christmas Tree/Cutting Preserver Spray |Preserves Christmas Trees, Wreaths, Garlands, Cuttings and Carved Pumpkins | Reduces Needle Drop | Keeps Cut Trees Fresh Longer | Natural (32 oz)
$21.99 (as of January 10, 2026 17:18 GMT +00:00 - More info- Product prices and availability are accurate as of the date/time indicated and are subject to change. Any price and availability information displayed on [relevant Amazon Site(s), as applicable] at the time of purchase will apply to the purchase of this product.
Rocky Mountain Goods Christmas Tree Food - 8 oz Tree Preservative - Reduce Needle Drop - Greener Scent - Fir, Pine, Spruce Trees - Extend Tree Life
$9.95 (as of January 10, 2026 17:18 GMT +00:00 - More info- Product prices and availability are accurate as of the date/time indicated and are subject to change. Any price and availability information displayed on [relevant Amazon Site(s), as applicable] at the time of purchase will apply to the purchase of this product.
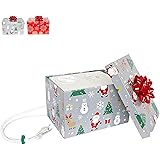
HoHoHoH2o Automatic Christmas Tree Watering System Device, Santa’s Tree Helper Keeps Your Christmas Tree Healthy and Fresh, Refillable 2.5 gallons Capacity Box - Silver/Festive
$84.95 (as of January 10, 2026 17:18 GMT +00:00 - More info- Product prices and availability are accurate as of the date/time indicated and are subject to change. Any price and availability information displayed on [relevant Amazon Site(s), as applicable] at the time of purchase will apply to the purchase of this product.
FirEver Pure Christmas Tree Food | Preserver Additive & Season Extender for Live Xmas Trees | Keep It Green, Reduce Needle-Drop | Miracle Freshness (8 oz)
$16.66 (as of January 10, 2026 17:18 GMT +00:00 - More info- Product prices and availability are accurate as of the date/time indicated and are subject to change. Any price and availability information displayed on [relevant Amazon Site(s), as applicable] at the time of purchase will apply to the purchase of this product.
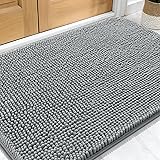
OLANLY Dog Door Mat for Muddy Paws 30x20, Absorbs Moisture and Dirt, Absorbent Non-Slip Washable Doormat, Quick Dry Chenille Mud Mat for Dogs, Entry Indoor Entryway Carpet for Inside Floor, Grey
$9.99 (as of January 5, 2026 18:53 GMT +00:00 - More info- Product prices and availability are accurate as of the date/time indicated and are subject to change. Any price and availability information displayed on [relevant Amazon Site(s), as applicable] at the time of purchase will apply to the purchase of this product.
TERRO Ant Killer Bait Stations T300B - Liquid Bait to Eliminate Ants - Bait System - 12 Count Stations for Effective Indoor Ant Control
$10.88 (as of January 5, 2026 18:53 GMT +00:00 - More info- Product prices and availability are accurate as of the date/time indicated and are subject to change. Any price and availability information displayed on [relevant Amazon Site(s), as applicable] at the time of purchase will apply to the purchase of this product.
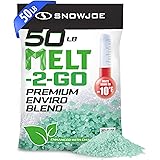
Snow Joe Premium Enviro Blend Ice Melt, Green-Coated Deicer Crystals, 50 lb - Safer Melter for Vegetation, Concrete & Metals w/ Anti-Corrosion Calcium Magnesium Acetate
$32.97 (as of January 5, 2026 18:53 GMT +00:00 - More info- Product prices and availability are accurate as of the date/time indicated and are subject to change. Any price and availability information displayed on [relevant Amazon Site(s), as applicable] at the time of purchase will apply to the purchase of this product.
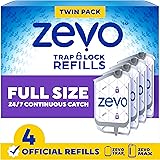
Zevo Flying Insect Trap Official Refill Cartridges - Fits Both Zevo Trap & MAX Indoor Fly Trap - Authentic Trap+Lock Technology to Catch Gnats, House & Fruit Flys (4 Official Refill Cartridges)
$14.82 (as of January 5, 2026 18:53 GMT +00:00 - More info- Product prices and availability are accurate as of the date/time indicated and are subject to change. Any price and availability information displayed on [relevant Amazon Site(s), as applicable] at the time of purchase will apply to the purchase of this product.
Advion Cockroach Gel Bait, 4 Tubes x 30-Grams, 1 Plunger and 2 Tips, German Roach Insect Pest Control, Indoor and Outdoor Use, Roach Killer Gel for American, German and Other Major Cockroach Species
$25.92 (as of January 5, 2026 18:53 GMT +00:00 - More info- Product prices and availability are accurate as of the date/time indicated and are subject to change. Any price and availability information displayed on [relevant Amazon Site(s), as applicable] at the time of purchase will apply to the purchase of this product.

