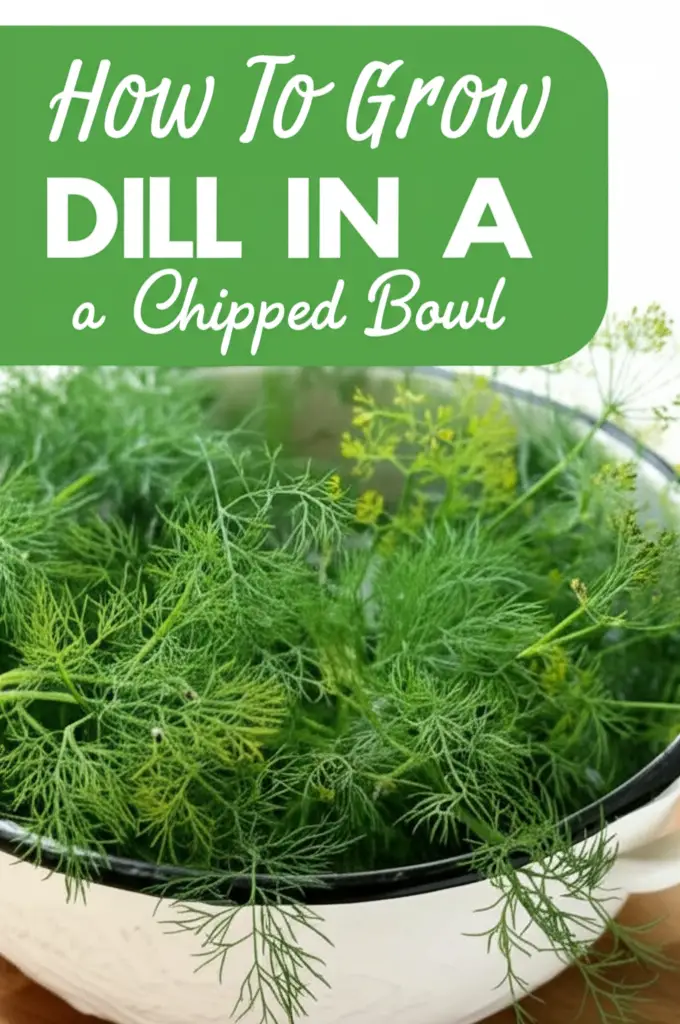
There’s something wonderfully charming about repurposing an old, chipped bowl into a thriving herb garden. And what better herb to start with than dill? Dill is an easy-to-grow, fragrant herb that adds a delicious flavor to various dishes, from pickles to dips to salads. This comprehensive guide will walk you through every step of growing dill in a chipped bowl, ensuring you have a bountiful harvest of this versatile herb right at your fingertips.
Whether you’re a seasoned gardener or just starting out, growing dill in a container like a chipped bowl is a fantastic way to enjoy fresh herbs, even if you have limited space. This method is perfect for balconies, patios, or even a sunny windowsill. Get ready to transform that chipped bowl into a mini-herb garden!
Why Grow Dill in a Chipped Bowl?
Before diving into the how-to, let’s explore why using a chipped bowl is a great idea for growing dill:
- Upcycling and Sustainability: Repurposing a chipped bowl gives it a new lease on life, reducing waste and promoting sustainable gardening practices.
- Aesthetic Appeal: A chipped bowl can add a rustic and charming touch to your garden or windowsill.
- Space-Saving: Container gardening is ideal for small spaces, making it perfect for apartments or balconies.
- Portability: You can easily move your dill plant to different locations to optimize sunlight exposure or protect it from harsh weather.
- Easy to Manage: Growing dill in a container makes it easier to control the soil quality, watering, and fertilization.
What You’ll Need to Grow Dill in a Chipped Bowl
Gathering the right supplies is essential for a successful dill-growing venture. Here’s a list of everything you’ll need:
- A Chipped Bowl: Choose a bowl that is at least 6-8 inches deep and wide enough to accommodate the dill plant’s root system. Make sure it’s clean.
- Dill Seeds or Seedlings: You can start dill from seeds or purchase seedlings from a local nursery.
- Potting Mix: Use a high-quality, well-draining potting mix specifically formulated for containers.
- Drainage Material: Gravel, pebbles, or broken pottery shards to line the bottom of the bowl and improve drainage.
- Watering Can or Hose: For watering your dill plant.
- Fertilizer (Optional): A balanced, slow-release fertilizer or liquid fertilizer to provide essential nutrients.
- Gardening Gloves: To protect your hands.
- Small Trowel or Spade: For planting and transplanting.
Step-by-Step Guide: Growing Dill in a Chipped Bowl
Follow these detailed steps to successfully grow dill in your chipped bowl:
Step 1: Preparing the Chipped Bowl
First, you need to prepare the bowl to ensure proper drainage and a healthy growing environment for your dill plant.
- Clean the Bowl: Thoroughly wash the chipped bowl with soap and water to remove any dirt, debris, or residue. Rinse well and let it dry completely.
- Drainage Holes (If Necessary): If your chipped bowl doesn’t have drainage holes, you may need to drill some. This is crucial to prevent waterlogging, which can lead to root rot. Use a drill with a masonry bit suitable for the material of your bowl (ceramic, clay, etc.). If drilling isn’t an option, be extra careful with watering and consider adding a thicker layer of drainage material.
- Add Drainage Material: Line the bottom of the bowl with a layer of gravel, pebbles, or broken pottery shards. This layer should be about 1-2 inches thick. This will help water drain freely and prevent the soil from becoming waterlogged.
Read More: How To Stop Possums Eating My Tomatoes?
Step 2: Choosing and Preparing the Soil
The right soil is essential for healthy dill growth. Dill prefers well-draining soil that is rich in organic matter.
- Select a High-Quality Potting Mix: Use a potting mix specifically designed for containers. Avoid using garden soil, as it can be too heavy and compact, hindering drainage and root growth.
- Amend the Soil (Optional): You can enrich the potting mix by adding compost, aged manure, or other organic matter. This will provide extra nutrients and improve soil structure.
- Fill the Bowl: Fill the chipped bowl with the potting mix, leaving about an inch of space at the top. Gently pat down the soil to remove any air pockets.
Step 3: Planting Dill Seeds or Seedlings
Now it’s time to plant your dill seeds or seedlings in the prepared bowl.
Planting Dill Seeds
- Sow the Seeds: Sprinkle dill seeds evenly over the surface of the soil. Dill seeds need light to germinate, so don’t bury them too deeply.
- Cover the Seeds Lightly: Gently cover the seeds with a thin layer of potting mix, about 1/4 inch deep.
- Water Gently: Use a watering can or spray bottle to moisten the soil. Avoid overwatering, as this can cause the seeds to rot.
- Provide Sunlight: Place the bowl in a sunny location that receives at least 6-8 hours of direct sunlight per day.
- Germination: Dill seeds typically germinate in 7-14 days. Keep the soil consistently moist during this period.
Planting Dill Seedlings
- Prepare the Planting Hole: Dig a small hole in the soil that is large enough to accommodate the root ball of the dill seedling.
- Remove the Seedling: Gently remove the dill seedling from its container, being careful not to damage the roots.
- Place the Seedling: Place the seedling in the hole and gently backfill with potting mix.
- Water Thoroughly: Water the seedling thoroughly to help it settle in.
- Provide Sunlight: Place the bowl in a sunny location that receives at least 6-8 hours of direct sunlight per day.
Step 4: Caring for Your Dill Plant
Proper care is essential for a healthy and productive dill plant. Here are some tips to keep your dill thriving:
- Watering: Water your dill plant regularly, especially during hot and dry weather. Keep the soil consistently moist but not waterlogged. Check the soil moisture by sticking your finger about an inch deep. If the soil feels dry, it’s time to water.
- Sunlight: Dill needs at least 6-8 hours of direct sunlight per day. If you don’t have a sunny location, consider using a grow light.
- Fertilizing: Fertilize your dill plant every 2-4 weeks with a balanced, slow-release fertilizer or liquid fertilizer. Follow the instructions on the fertilizer package.
- Pinching and Pruning: Pinch off the top growth of the dill plant to encourage bushier growth. Remove any yellow or brown leaves to keep the plant healthy.
- Support (Optional): As dill plants grow tall, they may need support to prevent them from falling over. You can use stakes or a small trellis to provide support.
Step 5: Harvesting Dill
You can start harvesting dill leaves as soon as the plant is about 6-8 inches tall. Here’s how:
- Harvesting Leaves: Use scissors or pruning shears to snip off the leaves. Start with the outer leaves and work your way in. Harvesting regularly will encourage the plant to produce more leaves.
- Harvesting Seeds: If you want to harvest dill seeds, allow the plant to flower. Once the flowers have dried and turned brown, you can cut off the seed heads and dry them further indoors. Store the seeds in an airtight container in a cool, dark place.
Troubleshooting Common Dill Problems
Even with the best care, you may encounter some problems while growing dill. Here are some common issues and how to address them:
- Yellowing Leaves: This could be due to overwatering, underwatering, or nutrient deficiencies. Adjust your watering schedule and fertilize as needed.
- Leggy Growth: Leggy growth, where the plant becomes tall and spindly, is often caused by insufficient sunlight. Move the plant to a sunnier location or use a grow light.
- Pests: Dill can be susceptible to pests like aphids, spider mites, and caterpillars. Inspect your plant regularly and treat any infestations with insecticidal soap or neem oil.
- Diseases: Dill is relatively resistant to diseases, but it can be affected by fungal infections like powdery mildew. Ensure good air circulation and avoid overwatering to prevent fungal problems. If necessary, treat with a fungicide.
- Bolting: Bolting is when the plant prematurely produces flowers and seeds. This can happen when the plant is stressed by heat or lack of water. To prevent bolting, keep the soil consistently moist and provide shade during the hottest part of the day. Once the plant bolts, the leaves may become bitter.
Dill Companion Planting
Companion planting involves growing certain plants together to benefit each other. Dill has several beneficial companions, as well as plants it should avoid.
Good Companions for Dill:
- Cabbage and Other Brassicas: Dill helps repel cabbage moths and other pests that attack cabbage, broccoli, and kale.
- Cucumbers: Dill attracts beneficial insects that pollinate cucumber flowers.
- Lettuce: Dill can provide shade for lettuce, preventing it from bolting in hot weather.
- Onions: Dill can help repel onion flies.
- Tomatoes: While opinions vary, some gardeners find dill to be a beneficial companion to tomatoes, attracting beneficial insects and potentially improving tomato flavor.
Plants to Avoid Planting Near Dill:
- Carrots: Dill and carrots are not good companions, as dill can attract carrot root flies.
- Fennel: Fennel can inhibit the growth of dill and other plants.
- Potatoes: Dill can attract potato beetles.
Using Your Homegrown Dill
Now that you’ve successfully grown dill in a chipped bowl, it’s time to enjoy the fruits (or rather, leaves) of your labor! Dill is a versatile herb that can be used in a variety of dishes.
- Fresh Dill: Use fresh dill leaves to flavor salads, soups, sauces, dips, and seafood dishes.
- Dill Pickles: Dill is a key ingredient in homemade pickles.
- Dill Vinegar: Infuse vinegar with dill for a flavorful addition to salad dressings and marinades.
- Dried Dill: Dry dill leaves for long-term storage. You can dry them in a dehydrator, oven, or by hanging them upside down in a cool, dry place.
- Dill Seeds: Use dill seeds to flavor breads, crackers, and other baked goods.
Read More: How to Make Small Lawn on Balcony?
Creative Ideas for Using Chipped Bowls in the Garden
Growing dill is just the beginning! Here are some other creative ways to use chipped bowls in your garden:
- Succulent Gardens: Create a miniature succulent garden in a chipped bowl.
- Herb Gardens: Grow other herbs like basil, mint, or thyme in chipped bowls.
- Seed Starters: Use chipped bowls as seed starting containers.
- Water Features: Turn a large chipped bowl into a small water feature for birds.
- Decorative Elements: Use chipped bowls as decorative elements in your garden, adding a touch of rustic charm.
| Aspect | Details |
|---|---|
| Container | Chipped bowl, at least 6-8 inches deep, with drainage holes if possible. |
| Soil | Well-draining potting mix, amended with compost or aged manure. |
| Sunlight | 6-8 hours of direct sunlight per day. |
| Watering | Regularly, keeping the soil consistently moist but not waterlogged. |
| Fertilizing | Every 2-4 weeks with a balanced fertilizer. |
| Harvesting | Snip off leaves when the plant is 6-8 inches tall. |
| Common Problems | Yellowing leaves, leggy growth, pests, diseases, bolting. |
| Companion Plants (Good) | Cabbage, cucumbers, lettuce, onions, tomatoes. |
| Companion Plants (Bad) | Carrots, fennel, potatoes. |
Frequently Asked Questions (FAQs) About Growing Dill
Conclusion: Enjoy Your Homegrown Dill!
Growing dill in a chipped bowl is a rewarding and sustainable way to enjoy fresh herbs. By following these steps and providing proper care, you can transform an old, chipped bowl into a thriving herb garden.
Enjoy the delicious flavor of homegrown dill in your favorite dishes, and explore other creative ways to use chipped bowls in your garden. Happy gardening!
Auto Amazon Links: No products found.
Perfect Plants Christmas Tree Saver 8oz. | Easy Use Xmas Tree Preserver Food | Have Healthy Green Christmas Trees All Holiday Season
$16.99 (as of February 2, 2026 23:07 GMT +00:00 - More info- Product prices and availability are accurate as of the date/time indicated and are subject to change. Any price and availability information displayed on [relevant Amazon Site(s), as applicable] at the time of purchase will apply to the purchase of this product.
VEVOR Tree Watering Bag Slow Release, 4 Pack 20 Gallons Tree Watering Bags/Ring, Reusable Refillable Tree Irrigation Ring Water Bags, Heavy Duty Watering System for Shrub Tree Root Drip Irrigation
$38.90 (as of February 2, 2026 23:07 GMT +00:00 - More info- Product prices and availability are accurate as of the date/time indicated and are subject to change. Any price and availability information displayed on [relevant Amazon Site(s), as applicable] at the time of purchase will apply to the purchase of this product.
Rocky Mountain Goods Christmas Tree Food - 8 oz Tree Preservative - Reduce Needle Drop - Greener Scent - Fir, Pine, Spruce Trees - Extend Tree Life
$9.95 (as of February 2, 2026 23:07 GMT +00:00 - More info- Product prices and availability are accurate as of the date/time indicated and are subject to change. Any price and availability information displayed on [relevant Amazon Site(s), as applicable] at the time of purchase will apply to the purchase of this product.
Wilt-Pruf® Christmas Tree/Cutting Preserver Spray |Preserves Christmas Trees, Wreaths, Garlands, Cuttings and Carved Pumpkins | Reduces Needle Drop | Keeps Cut Trees Fresh Longer | Natural (32 oz)
$21.99 (as of February 2, 2026 23:07 GMT +00:00 - More info- Product prices and availability are accurate as of the date/time indicated and are subject to change. Any price and availability information displayed on [relevant Amazon Site(s), as applicable] at the time of purchase will apply to the purchase of this product.
Mini Decorative Watering Can, Set of 6, Height 1.97 inch, Cute Metal Jug for Hand Crafts,Garden Theme Parties and Home Decor
$8.99 (as of February 2, 2026 23:07 GMT +00:00 - More info- Product prices and availability are accurate as of the date/time indicated and are subject to change. Any price and availability information displayed on [relevant Amazon Site(s), as applicable] at the time of purchase will apply to the purchase of this product.
